The main aspects of having a superb pagespeed score is to understand what you want to achieve. The google metrics can be very challenging to understand, but everything boils down to three essential things:
- Server response time – the faster it responds, the faster the data transfer begins
- The amount and way of how the asset data is being transfered from the server to the browser
- How fast the data is processed and optimized, so the page is interactive ASAP
In the following steps we will look at some specific optimizations, touching each of these points. Everything is based on our experience, this is what we actually do to achieve 100 points for this website.
Custom codes we may suggest in the chapters below should be used in your child theme functions.php file. We do not recommend editing your main theme files. Needless to say, that always use backups before editing. Keep in mind, that some of the code may not suit your case as is, you can still make modifications to your needs.
Selective plugin loading – load plugins only when needed
Did you know, there is actually a way to prevent WordPress plugins from loading on specific pages, saving huge amounts of server resources where needed?
Let’s say, you don’t want all of WooCommerce loaded on your blog pages, only on products and shop – is there a way to stop it from loading?
Turns out, this is very much possible, and we made an open source, free, easy to use, out of the box and lightweight solution for everyone, the WordPress Selective Plugin Loader MU Plugin.
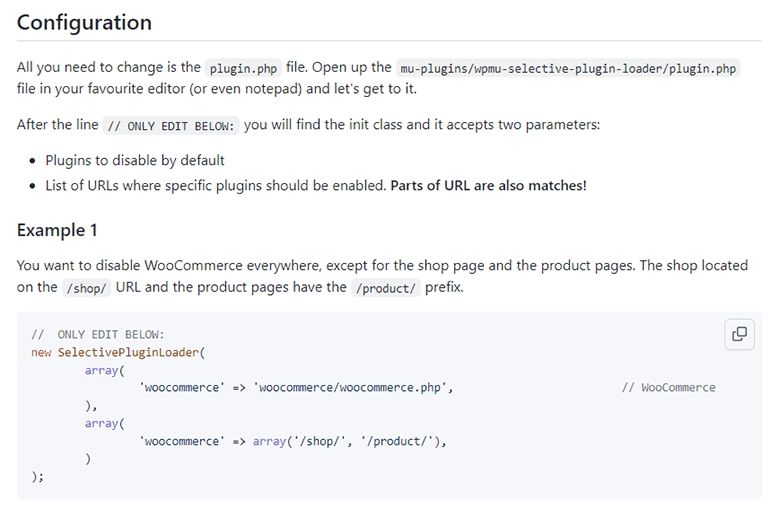
The WordPress Selective Plugin Loader offers a very simple way to restrict your plugins. This can hugely improve your overall server performance and response time.
Don’t worry, this is not another optimization plugin, it is not actually a plugin at all. The way it works is not like a regular installable plugin, because regular plugins can’t control the loading process. This solution uses the WordPress Must Use Plugins feature. Must Use plugins are simple code, executed before WordPress initializes – which is the environment needed to control the plugin loading flow.
This requires a bit of code editing, but nothing complicated. Everything is explained in the reporsitory page.
Converting all images to WEBP format automatically
WEBP is considered to be a next-gen image format, by now most of your website images should use them (according to google pagespeed insights).
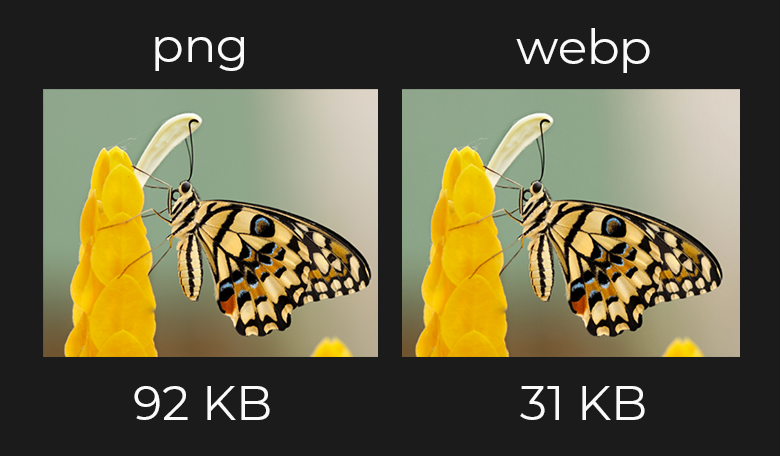
WEPB images are generally better compressed, then their predecessors – like jpeg, png, gif or bmp images
Instead of going through the hussle of converting and replacing all of the images, or using expensive plugins, you can simply use a few lines of custom code.
The custom code below will convert any images (requested via the wp_get_attachment_image_src hook by any means) to WEBP formats – keeping the original files of course. The files will be stored next to the originals, with the same name, but with the .webp extension.
function asp_some_images_to_webp($image, $id, $size) {
	if ( strpos($image[0], '.webp') === false ) {
		$filepath = get_attached_file($id, $size);
		$old_filename = basename(parse_url($image[0], PHP_URL_PATH));
		$old_filepath = pathinfo($filepath, PATHINFO_DIRNAME) . '/' . $old_filename;
		$new_filename = sanitize_file_name(pathinfo($old_filename, PATHINFO_FILENAME) . '.webp');
		$new_filepath = str_replace(basename($filepath), $new_filename, $filepath);
		$new_fileurl = str_replace( $old_filename, $new_filename, $image[0] );
		if ( !file_exists($new_filepath) ) {
			$img = imagecreatefromstring(file_get_contents($old_filepath));
            if ( $img !== false ) {
				imagepalettetotruecolor($img);
				imagealphablending($img, true);
				imagesavealpha($img, true);
				imagewebp($img, $new_filepath, 100);
				imagedestroy($img);
			} else {
                return $image;
            }
		}
		$image[0] = $new_fileurl;
	}
	return $image;
}
add_filter('wp_get_attachment_image_src', 'asp_some_images_to_webp', 10, 3);
Removing unwanted Emojis
Chances are, your website does not need emojis whatsoever. This small custom code snippet removes all wp emoji related styles and scripts.
function wp_disable_emojis() {
	remove_action( 'wp_head', 'print_emoji_detection_script', 7 );
	remove_action( 'admin_print_scripts', 'print_emoji_detection_script' );
	remove_action( 'wp_print_styles', 'print_emoji_styles' );
	remove_filter( 'the_content_feed', 'wp_staticize_emoji' );
	remove_action( 'admin_print_styles', 'print_emoji_styles' );
	remove_filter( 'comment_text_rss', 'wp_staticize_emoji' );
	remove_filter( 'wp_mail', 'wp_staticize_emoji_for_email' );
}
add_action( 'init', 'wp_disable_emojis' );
Removing the block library and classic theme CSS where not needed
If you have pages or parts on your website not using the Gutenberg editor blocks, then we have good news for you – you can remove the block editor styles from those pages.
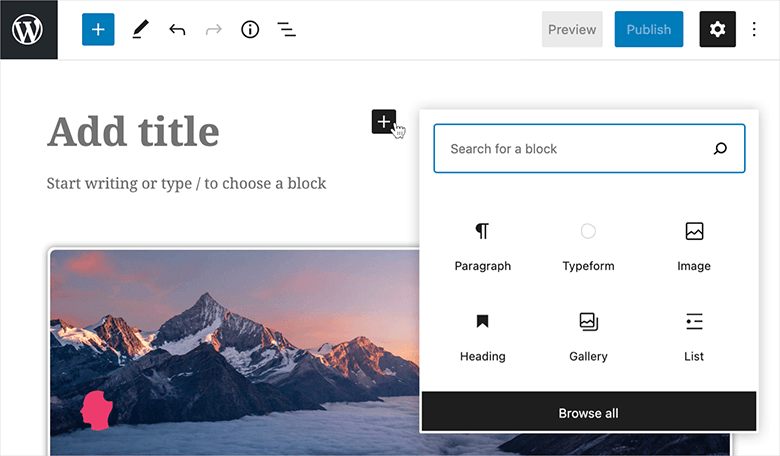
You may not use Gutenberg on all of your site pages, so why would you want to load all of it’s assets everywhere?
This code below will remove the Gutenberg CSS alltogether on all of the pages:
function asp_remove_block_css() {
	// Always remove
	wp_dequeue_style('wp-block-library'); // WordPress core
	wp_dequeue_style('wp-block-library-theme'); // WordPress core
	wp_dequeue_style( 'classic-theme-styles' ); // Classic Themes
}
add_action( 'wp_enqueue_scripts', 'asp_remove_block_css', 100 );
You can add conditional parts, so that only specific pages or parts of the website are affected:
function asp_remove_block_css() {
	// Only remove when these conditions are met
	if (
		in_array(get_the_ID(), array(1, 2, 3)) // When page ID = 1 or 2 or 3
		|| is_home() // Post archive
		|| is_post_type_archive('blog') // "blog" post type archive
	) {
		wp_dequeue_style('wp-block-library'); // WordPress core
		wp_dequeue_style('wp-block-library-theme'); // WordPress core
		wp_dequeue_style( 'classic-theme-styles' ); // Classic Themes
	}
}
add_action( 'wp_enqueue_scripts', 'asp_remove_block_css', 100 );
Removing jQuery migrate
A lot of plugin frontends (including our Ajax Search Pro) do not require jQuery anymore. Theme developers are also moving to the direction of modern ES6+ javascript standards where they can.

Unfortunately the process is slow and still a lot of sites do use the jQuery library and the jQuery migrate is automatically loaded with it. It is very unlikely you need the migrate library if you keep your site up to date.
To remove it, use the custom code below, no need for additional plugins for that:
function remove_jquery_migrate( $scripts ) {
	if ( ! is_admin() && isset( $scripts->registered['jquery'] ) ) {
		$script = $scripts->registered['jquery'];
		if ( $script->deps ) {
			$script->deps = array_diff( $script->deps, array( 'jquery-migrate' ) );
		}
	}
}
add_action( 'wp_default_scripts', 'remove_jquery_migrate' );
After this custom code make sure to test everything on your site front-end just to be sure that everything works as expected.
Adding lazy loading to Gutenberg image blocks
Modern browsers do not require lazy loading scripts for images – the HTML5 loading=”lazy” attribute tag takes care of that. WordPress automatically adds this loading tag to most of the images, we noticed that some Gutenberg related image blocks do not have it.
To make sure the lazy loading tag is added, use the custom code below:
add_filter( 'render_block', 'add_gutenberg_image_block_lazy_tag', 10, 2 );
function add_gutenberg_image_block_lazy_tag( $block_content, $block ) {
	if ( 'core/image' !== $block['blockName'] ) return $block_content;
	if ( strpos($block_content, '<img loading') === false ) {
		$block_content = str_replace('<img ', '<img loading="lazy" ', $block_content);
	}
	return $block_content;
}
Your website logo
As stupid as it may sound, there is a way we prefer our logo – instead of an image file, we use an inline SVG format. What is that? Well, SVG is basically a vectorgraphic image, which you can use as a regular image file – but you also copy the SVG file contents as inline HTML code, without using the file.
What is that good for?
Lets say you have your website logo as an image file:
<img src="logo.png">The browser has to make a request to load this file initially, as it does with all of the assets. Now, let’s say you were to convert your logo image to an SVG file. It does not change much, the file name is different, so this is not an improvement:
<img src="logo.svg">The image file still needs to be loaded. However, if you open that file, instead of the regular gibberish, you will find some interesting structured data, very similar to HTML markup.
For example this is part of this websites actual logo:
<svg xmlns="http://www.w3.org/2000/svg" viewBox="0 0 176.64 26.62">
<defs>
<style>
.cls-1{fill:#fff}
</style>
</defs>
<g>
<path class="cls-1" d="m13.59 20.4-1.32-2.93H5.78L4.46 20.4H.6L8.75 3.6h.55l8.15 16.8h-3.86Zm-6.5-5.81h3.84l-1.92-4.25-1.92 4.25Z"></path>
<path class="cls-1" d="1.19-.83-1.99-....."></path>
<path class="cls-1" d="m174.49 24.75-6.88-7.26 1.29-1.39 7.74 6.34-2.15 2.31z"></path>
</g>
</svg>
The full logo code is bigger, but you get the point. Now, if we use this code directly, instead of the image tag – then the browser does not have to load the image asset, it is printed inline, all it has to do is rendered it.
When should you consider using inline SVG instead of the original logo image?
This is preferable in almost every case. In our experience, if the SVG logo is only 50% bigger as the original logo file, it is still very much worth switching to it. The page size will increase, but new visitor browsers will have one less request to make – very likely improving the pagespeed score.
How to get an SVG logo
There are online tools to generate SVG from your existing logo – but it is much more effective to save the original logo file in SVG format. .
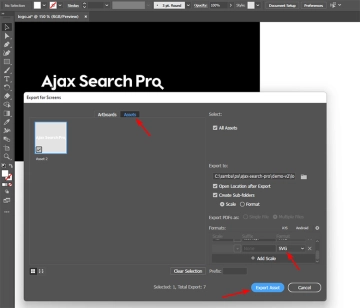
For example, if your logo was created in Adobe Illustrator or any similar vectorgraphic program, you can simply export to SVG with a click of a button
Cache plugins – or do you actually need one?
This is very tricky to answer. On this website we don’t use any cache plugins. If you aim to get the best Web Vitals score possible, then perhaps deciding on the cache plugin is the last thing you should do. As you can see, we are still getting almost perfect web vitals scores, even though there is no cache plugin.
The reason is, that first you have to make sure, that everything else is fully optimized as it should be, and then get a cache plugin if needed. Cache plugins will help mitigating the server load, by generating a static page cache, combining and minifying javascript and CSS assets, improving the database load etc..
You should however definitely use a CDN, we prefer Cloudflare, but it’s up to you. CDN providers will mostly help speeding up the requests to your static resources, improving your website overall loading times.
